
So when my Father's Mother Passed away this year, my Mother saw the opportunity to create something for each of the women in the family to have of Hers. Actually, my Mother saw the opportunity for me to create something.
So here is what I came up with. This is my first attempt at documenting a project. As you may know, or as you will soon find out, I make stuff up as I go. I am not a professional anything (yet) and I am not always as classy as this blazer. In fact, I have been known to be downright ignorant and offensive. Take this information, go forth and hopefully learn a new project. Hopefully you can have some fun with it too.
Let me know what you think!
Re-Purposed Jacket to Gift Card Holder

Materials
A old peice of clothing or a scrap of wool/flannel/fleece cut to 4.5" x 6"
Button or snap
Optional - fabric for an applique on the back
*I used a serger to connect the seams, a sewing machine to make the button hole and embroidery thread to attach applique and button. This can all be done by hand sewing techniques or with a sewing machine.
Description
My Grandmother was classy. I have no doubt that she is in Heaven with a blazer and pearls, sitting by a large pool, sipping a martini.
This was one of her favorite staple blazers...


Every year for Valentines Day, the women of the family go to Florida and they usually exchange a small gift during their trip. My Mother decided she wanted to try to re-purpose the blazer into eight gift card holders like the one from Starbucks. So, naturally, hand it over to her daughter who is always willing to drop everything to craft for her. Here is what I did.
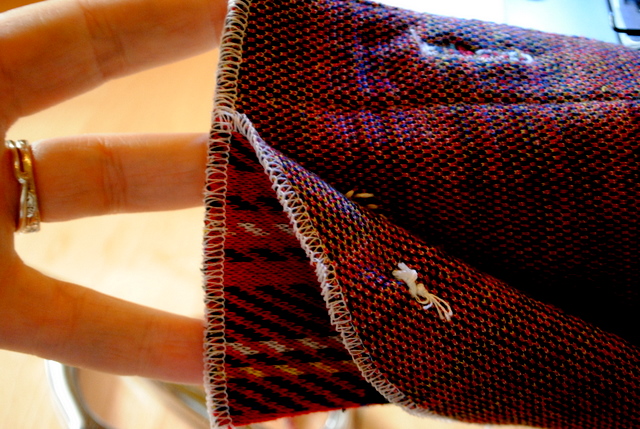
The trim of the blazer is nice and thick and the buttons are awesome vintagey (look it up haters) gold, perfect.


I cut out a template from a scrap piece of fabric. Because the material of the blazer is flexible and has a bit of give to it, I wanted it to be almost the same size as a gift card. So I made it 4.5" x 6"
Allow me to interject something, like you really have a choice. I was talking to my Husband about how to describe the texture of this fabric. We were throwing out options and 'supple' was thrown in. I now realize that word is not okay. I can not stop thinking of the word 'nipple' now. Making this project a bit more classy.After finishing, I had plenty of room for several cards. I lined up the template so one of the short ends goes along the nice thick, trim.


I added a felt heart to the back of mine, you can add anything. It would be super hipster if you added a bird.
Do yourself a favor and follow that link. You will never be the same.


After applying the applique, lined up the button and the buttonhole. I did not take pictures of this process.
For this one, I was able to use one of the button holes that was on the blazer, so I just added the button. Pretty simple. For the seven others, I had to actually add the buttonhole and place the button. As I said earlier, this can all be done with a buttonhole embroidery stitch (this stitch can be used for both the buttonhole and the seam). Wondering how many more times I can say buttonhole?Then I serged the top seam, and serged the sides together (spellcheck does not recognize serged. Nor does it recognize spellcheck. Thought you should know).
I did not set my tension correctly, looks sloppy.


As you can see, the tails that are left over from the serger are obnoxious. But, you do not want to just cut them, they will unravel over time. Like two minutes. The following pictures show what to do with those...


I usually add some Frey Check on the place I cut, just to make sure it doesn't poke through.

TaDa!
Let me know if you have any questions. Pretty simple project. Enjoy!


No comments:
Post a Comment